Bodynet informatie database.

Collapse
X
 
  • Filter
  • Time
  • Show
Clear All
new posts

  • #61
    Feeling the Muscle vs. Moving the Weight

    Here's what you need to know...

    • Before you lift, decide what your main goal is. The goal to achieve a specific look requires different lifting approach than the goal to become a better performance athlete.
    • Those who lift in order to improve their athletic performance are most concerned with moving the weight from point A to point B the most efficiently with the most weight.
    • Those who lift in order to look a specific way should focus on feeling the target muscles working. Moving a weight from point A to point B is secondary.
    • The amount of weight you use, your rep speed, and your mental focus will be different based upon your main goal.


    Your Decision

    Before the start of every set, you have a crucial decision to make. It's not the amount of weight to put on the bar or the number of reps to accomplish. It's something more abstract, yet just as important.
    You need to decide whether your main purpose is to move the weight or to feel the muscle.
    In other words, is your primary goal an objective performance measure like getting the maximum number of reps with that particular weight, or is it your goal to really feel the muscle working?
    These are very different goals. A set done with either of these goals in mind will also look much different – one will be heavier and more explosive, while the other will be lighter and more controlled.
    Which way is better? As different as these two approaches are, neither is inherently better than the other; they just serve different purposes.
    So let's take a closer look at feeling the muscle versus moving the weight and see which one is best used when.

    Movements Versus Muscles

    Athletes involved in power and movement-based sports (MMA, football, powerlifting) should generally focus on training movements, while physique athletes should focus on training muscles.
    Athletes who participate in movement-based sports need to be able to move better to improve their performance. An MMA guy doesn't need to worry about the size of his pecs. Instead, he needs to be concerned with the ability of his pecs to generate maximum force rapidly and repeatedly, enabling him to land more damaging strikes to his opponent.
    Similarly, a BMX racer isn't concerned about whether his legs look good in his underwear. No, he cares more that those legs can apply maximum power to get him out of the gate and around the track as quickly as possible.
    On the other end of the spectrum, physique athletes who are more interested in improving the appearance of their musculature – let's call them bodybuilders – aren't concerned about power output or endurance capacity. They're concerned about how the muscles end up looking as a result of their training.

    Related:  10 Reasons Bodybuilders Are More Jacked Than Powerlifters

    Bodybuilders and other physique competitors don't care what their vertical jump is or even how much they can squat – they're simply concerned about having full, evenly developed quads that have good separation between the three visible quad heads.
    And a figure competitor isn't concerned about her ability to perform the maximum number of pull-ups in the shortest amount of time. She wants maximum lat development, thus making her waist and hips appear narrower.
    Even though it's pretty unanimous that athletes and bodybuilders ultimately have different training goals, this fact tends to be lost by the time we hit the gym floor. So let's look at a few practical ways that athletes and bodybuilders can finely tune their training to maximize the desired outcome.

    Training The Movements: 3 Factors

    There are quite a few ways an athlete can tailor his or her training to maximize the performance adaptation.

    1. Rep Speed

    A great, no-nonsense rule is that if you want to be able to move fast, you need to train fast. Simply put, you get better at what you do.
    To maximize strength and speed, you'd need to be able to recruit the maximum number of muscle fibers and get the nerves that innervate those fibers to fire as strong a nerve impulse as possible.
    In other words, if you're a strength athlete then you want to maximize motor unit recruitment and neural coding. One way to accomplish this is by increasing rep speed. Performing a rep explosively will maximize both motor unit recruitment and neural coding.
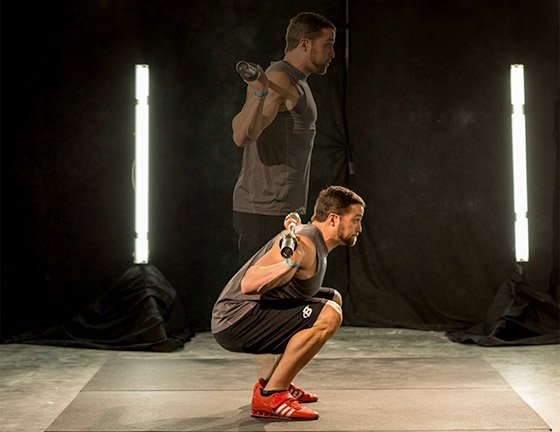
    So let's say you're doing a set of back squats. It would make sense to perform the concentric portion (standing up) as quickly as possible. By doing so regularly, you'll be able to apply maximum force at any given moment.
    Although caution should be used when doing anything other than controlled eccentric movements, doing the eccentric portion of the squat quickly will also serve to maximize motor unit recruitment.
    This occurs especially as you reach the point in the rep where the momentum from the rapid eccentric descent must be quickly decelerated, stopped, and then changed in direction rapidly by quickly generating a concentric contraction.
    So by training explosively, you develop the ability to move faster.

    2. Weight Selection

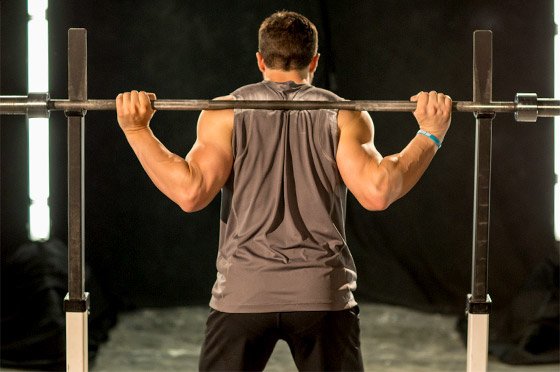
    Competitive athletes can improve their ability to perform certain movement patterns by regularly performing them under a heavy resistance. A fighter performing the bench press will develop better explosive pushing power to help him literally push his opponent around.
    If you're an athlete, you'll benefit from using a relatively heavy weight (high percentage of 1RM) when doing the bench press to maximize the improvements in motor unit recruitment and neural coding.
    So if you're an athlete in the middle of a set of barbell bench presses, you should be focused on moving that heavy resistance as explosively as possible – not on feeling the pecs working.
    And that leads us to the final difference between training for movements versus muscles – mental focus.

    3. Mental Focus

    Where you place your mental focus during a set is the single-most defining factor in what results that set will produce.
    Watch a CrossFitter do a set of pull-ups and watch a bodybuilder do a set of pull-ups – they look totally different, almost like they're not even the same exercise. The reason for this is the mindset or purpose of the lifter.
    Someone doing CrossFit is going to be more concerned about doing the greatest amount of pull-ups in the shortest period of time possible. And to do so, the reps are done in a way that maximizes performance and efficiency. Feeling the muscles work is of no concern.

    Related:  Bodybuilder Goes CrossFit

    A bodybuilder doing pull-ups will be focused solely on feeling the muscles working.
    When you begin a set of any given exercise, where you place your focus will determine how you perform, and how you perform will determine what type of training adaptations occur.
    Training The Muscles: Three Factors


    Take a look at how the same three factors would be different for someone concerned more about the cosmetic appearance of his physique.

    1. Rep Speed

    The main thing to remember about rep speed for bodybuilding is this: train just slowly enough that you can make sure the target muscle is doing the brunt of the work. Rep speed is secondary to stimulating the right muscle.
    Although it's not a bad idea to occasionally train with a higher rep speed to maximize motor unit recruitment, training for hypertrophy is generally more about making sure the target muscle is trained and under tension for an optimal amount of time.
    Hypertrophy is as much about time under tension (TUT) as it is about maximizing the number of muscle fibers stimulated.
    A bodybuilder must first make sure that the rep speed he's using allows him to keep the tension squarely on the target muscle. That'll usually be a much slower rep speed than you'd see from someone training for athletic performance. The eccentric or negative phase of the rep especially will be done more slowly and under control.
    The concentric can, and should, be done a bit more explosively to recruit the maximum number of motor units – even for those training for hypertrophy.

    2. Weight Selection

    Choosing the right resistance for bodybuilding training follows a similar protocol to rep speed. First, make sure you're targeting the right muscle, then feel free to use relatively heavy weight without losing the feeling of the target muscle working.
    That's one thing that's so unique about bodybuilding and hypertrophy training: training like a power athlete with heavy resistance and/or high rep speed can certainly be beneficial, especially because of the aforementioned neurological changes that occur.
    But doing it without stimulating the right muscles won't lead to growth in the right areas.
    For example, let's say you're a bodybuilder doing the barbell bench press in order to bring up your pecs. If you aim to use as much weight as possible and move that weight explosively, no doubt you'll "perform" better, but if doing so shifts a good portion of the work away from your chest to your anterior delts, then you've robbed your pecs of the stimulation they need to grow.
    You can't chase two rabbits at once. Don't try to perform better at the expense of staying small.
    That leads us to our final, yet most significant way in which bodybuilders should train differently than athletes.

    3. Mental Focus

    When training for muscle growth your mind needs to be on the target muscle.
    If you don't focus on the muscle you're trying to bring up, your body will revert to what it's good at, namely letting the same muscles "sleep" and calling upon already overworked muscles surrounding the ones you're wanting to build.
    Doing an exercise without feeling the target muscle work will not only delay progress, it can also set you back by exacerbating muscle imbalances.
    When you keep training a muscle you don't readily feel working, it's natural for your body to try to work around this inefficient, sleepy muscle by changing the motor program to recruit more efficient, ready-to-work muscles.

    Related:  Mind-Muscle Connection: Fact or BS?

    The only way to make sure you get out of the exercise what you need is to use that powerful muscle between your ears. Make sure that you feel the right muscles working as much as possible from the onset of the first rep to the completion of the last.
    Tweak your form, alter your rep speed a bit (usually by going slower), or consider employing a technique like isometric holds – especially in the contracted position – to make sure you feel the stress of the exercise in the right place.

    What's Your Decision?

    Bodybuilders can benefit from training like an athlete and vice versa. But just like you'd focus your attention on learning a language if that's what you want to learn, you must decide before each set what your primary goal is. Then train accordingly.

    Skeggǫld, Skálmǫld, Skildir ro Klofnir.

    Comment


    • #62
      Growth Factor Shoulder Training

      Here's what you need to know...

      • People who only lift heavy or do Olympic-style lifting rarely have impressive arms and shoulders. The exception is heavy lifters who add high-rep, isolation work.
      • Doing only the big basics can lead to strength imbalances that will ultimately impair your performance and size.
      • The supersets described below cause muscle to contract, which restricts blood flow and leads to the release of local growth factors.
      • Warning: You need high pain tolerance to do this shoulder workout!


      Few Olympic Lifters Look Lean and Muscular

      I love lifting big weights on the big basic lifts. But I can't ignore the fact that "pump" training also works when it comes to building muscle. Plenty of people have built a lot of muscle doing isolation work to a skin-bursting pump, including strength-oriented athletes.
      But few Olympic weightlifters, despite hoisting monstrous weights over their heads, have what we'd call muscular bodies. They have solid legs, glutes, and lower back for sure. And some exhibit thick upper bodies.
      But most look "solid" instead of lean and muscular. It's true that they use mostly their legs, hips, and trunk to lift the weights, but you'd still expect more muscle in the delts and arms from people who can lift 400-500 pounds over their heads.

      Exceptions to the Rule

      The exception to this seems to be the Chinese lifters, along with some other Asian countries with similar training systems. Despite being less genetically designed to carry a lot of muscle, their Olympic lifters are a lot more muscular than most other competitors.
      This is especially true of the arms, shoulders, and back. If you look into their training you'll see that they actually do a lot of isolation work for higher reps on exercises such as lateral raises, triceps extensions, and biceps curls.
      They also do plenty of rows, dips, and pull-ups for higher reps (8-10). They often go for 6 sets of 8-10 reps with short rest periods on several bodybuilding exercises at the end of their session.
      Why would athletes who already train four hours a day or more do 30-45 minutes of additional daily work if it wasn't productive?
      Well, they understand that muscle moves weight, and that if you have more muscle you can move more weight if your nervous system is effective at utilizing that muscle.
      And I've learned through experience that volume builds muscle.

      The Problem With Shoulders

      Sure, getting stronger will help you get bigger. If you add 100 pounds to all your big lifts you'll surely have a lot more muscle mass. But it's not necessarily the fastest route, especially for muscles like the shoulders.
      The shoulders are fragile. The shoulder joint is the least stable joint in the body and very complex. There are more than ten muscles that directly influence the way the shoulder moves, and that joint can move in pretty much every direction.
      So it's very easy to become unbalanced and develop nagging and persistent shoulder aches, if not severe injuries.
      That's the problem with relying only on the big basics: You stand a much better chance of developing strength imbalances that will ultimately impair your performance, comfort, and ultimately your size.
      Furthermore, many strong muscles assist the deltoids. As such, it can become hard to stimulate the deltoids fully with only big lifts.
      Sure, the delts receive some loading, but sometimes other muscles contribute disproportionately more and will grow faster. As they grow faster, the shoulders become proportionally weaker and harder to involve – the body will use the stronger muscles to do the job. Injury is then more likely.
      Related:  3 Shoulder Killers to Avoid

      This is why I like to use time under tension as well as multiple angles to develop the shoulders. In fact, I want to use as many different angles as possible when working the delts directly.
      This will not only make the shoulder more functional and injury-proof, but it will also maximize size.

      Constant Time Under Tension and Muscle Development

      The research is clear: You can stimulate growth without the use of heavy loads by increasing the release of local growth factors during exercise.
      This is the foundation of occlusion training as well as the constant-tension rep style. But the latter is the one that is of interest to us today.
      When a muscle is contracting, blood flow into the muscle is restricted. Blood will rush in when the muscle relaxes – between reps if the muscle stops contracting and at the end of the set.
      As long as the muscle is working and blood flow is restricted via muscular contraction, metabolites will build up in the muscle and this will lead to the release of local growth factors.
      That's the basis of this training approach to the shoulders. This program will build muscle rapidly. When I use it after focusing only on the big basic lifts, my physical appearance changes almost instantly, almost like muscle is migrating toward the delts!
      To maximize growth factor stimulation, the main thing to focus on is stimulating as much lactate build-up in the target muscle as possible. You need to have a high pain tolerance for this to work optimally!
      Lactate accumulation through muscular work is maximized when the muscle is under tension for 45-70 seconds. This program is based on sets falling in that range. And since the shoulders have so much mobility, I prefer to use multiple exercises in each set to strengthen every angle of shoulder movement.
      The program itself uses 5 supersets and you will do 3 sets of each, for a total time under constant tension of about 15 minutes. But each of these supersets will work great as a standalone, too. For maximum develop, use all five.

      Superset #1 Multi-Press Complex

      Each set is made up of 6 different presses and we go from the weakest to the strongest, a concept known as mechanical drop sets.
      The 6 exercises, done without any rest, are:
      A. Seated Muscle Snatch (seated to avoid using the lower body) or Barbell Cuban Press
      B. Behind the Neck Press, Snatch Grip (seated)
      C. Behind the Neck Press, Clean Grip (seated)
      D. Savickas Press (military press seated on the floor with extended legs and no back support)
      E. Bradford Press (standing)
      F.  Push Press (standing)

      The goal is to do 5 reps for each exercise, but don't freak out if you only get 3 or even fewer near the end. If that does happen, don't increase the weight the following session. Start conservative. By using constant tension, the fatigue and pain will quickly build up!
      Do 3 sets of this exercise with about 90 seconds of rest between sets.
      Important: You'll note that this superset/complex uses the behind the neck press, an exercise that has been made to be the work of the devil in recent times. People believe that it will potentially hurt the shoulders.
      Well, that's true if you have zero shoulder mobility, but being able to press in that position is part of the normal shoulder function.

      It's true that some people might have trouble with the behind the neck press, especially those with a severe "shoulder forward" posture, or immense bodybuilders with massive pecs and front delts.
      As T Nation contributor Paul Carter has said, if your shoulders are healthy and have good mobility, they cause no issues. If your shoulders aren't healthy, perhaps from too much bench pressing, you won't be able to do behind the neck presses. It's not the other way around.

      The behind the neck press is a more complete shoulder exercise. You get a stronger contraction in the lateral and rear deltoids. The military press hits the anterior deltoid hard but is less complete.
      Furthermore, don't forget that due to the nature of this complex, you won't be using much weight, so the behind the neck presses won't be traumatic and will actually help you restore full shoulder function.

      Superset #2 Dumbbell Press Multi-ROM

      This is similar to the good old 21 technique, which is also based on constant tension and lactate build-up, but we'll do sets of 5-5-10 instead of 7-7-7. That means:
      A. 5 partial reps doing only the bottom half of the movement
      B. 5 partial reps doing only the top half of the movement
      C. 10 full reps

      On the full reps you want to do the reps smoothly, not stopping at the top or bottom between the phases of the lift. Stop about half an inch before locking out to keep the deltoids under tension.
      The partial reps will cause a rapid hypoxic state (lack of oxygen) and a rapid build-up of lactate, whereupon you do your full reps in that state.

      Do 3 sets with about 90 seconds of rest in-between sets.

      Superset #3 Shoulder Circles/Scott Press/Press

      I started using loaded shoulder circles when I did a lot of ring work in my own training. This is a highly underrated exercise and a great movement to prepare the whole shoulder joint for brutal work.
      It does so by activating most muscles involved with shoulder movements, and because of that it also makes it an interesting hypertrophy tool since it can stimulate a lot of muscle. It's a great option to use as the first move in a pre-fatigue superset.

      The second exercise is a Scott press, which is very similar to an Arnold press in that you're starting the movement with the arms in front of you and rotating them outward as you press up. The difference is that in an Arnold press, you press straight up once you rotate your arms, while the Scott press uses a more circular motion.
      As a result, at the top the arm is inclined slightly forward, making the elbows project back further than the wrists. That circular motion hits the lateral portion of the delts more.
      Once you're done with the Scott press, you finish your set with regular dumbbell presses but with a slight twist: you'll press while having the outside weight plate higher up than the inside one, and keep it that way for the whole pressing movement. This puts more stress on the lateral portion of the delt.

      One set looks like this:
      A. Shoulder Circles 10 reps front-to-back
      B. Shoulder Circles 10 reps back-to-front
      C. Scott Presses 6-8 reps
      D. Dumbbell Presses 6-8 reps

      Do 3 sets, resting for about 90 seconds between sets.
      Superset #4 Dumbbell Lateral Complex

      This is my favorite medley/superset to isolate and annihilate the delts. It hits them from multiple angles, which is important for full development.

      Four different variations are used, all done back-to-back without rest:
      A. Top-Half Front Raise (from parallel to the floor, to overhead) 4-6 reps
      B. Lateral Raise 4-6 reps
      C. "Y" Lateral Raise with thumbs up 4-6 reps
      D. Outside-In Raise 4-6 reps
      Perform 3 sets, 90 seconds in between.
      Superset #5 Bus Driver/Front Raise

      The first movement is the "bus driver" exercise where you hold a plate at arms length in front of you and rotate slowly. It's a hugely underrated movement.

      The bus driver puts the whole deltoid group under constant tension and works angles that aren't normally trained in the gym. It's an excellent way to finish the shoulder workout and make the joint more resilient to injuries.
      The second movement is the front raise using three different grips: narrow, shoulder-width, and wide.
      Using the different grips makes this a mechanical drop set: When you can't do an exercise any more, you continue to do reps by changing the leverage. By taking a wider grip you shorten the resistance arm, which will make the movement a bit easier, allowing you to get more reps in without having to decrease weight.
      The change in grip might also bring some new motor units into the mix, which is a benefit since the more motor units you recruit and fatigue, the more you'll grow.

      A. Bus Driver 6-8 reps per side
      B. Front Raise dumbbells about 1-inch inside shoulder-width, 6 reps
      C. Front Raise index finger in line with outside edge of deltoid, 6 reps
      D. Front Raise wide grip, 3-4" wider than shoulder width, 6 reps

      We're shooting for 6-8 reps per side for the bus driver exercises and about 6 reps for each of the three grips on the front raise, but really the goal is to fatigue and to pump up the muscles as much as possible. If that goal is accomplished, it doesn't matter if you did 5 or 10 reps per position.
      IMPORTANT: When you do your barbell front raises, imagine rotating your elbows up instead of just lifting the arms up. This will increase the activation of the lateral head of the deltoid.

      Maximize Results

      Get ready to quickly put size on your delts, especially if you're someone who is used to heavy pressing work.
      Related:  Delts on Fire

      This program is based on maximizing local growth factor release as well a sending a ton of nutrient-rich blood into the muscle. This means that usingPlazma™ before and during your workout to maximize the amount of anabolic nutrients in your blood will lead to even greater results.

      Skeggǫld, Skálmǫld, Skildir ro Klofnir.

      Comment


      • #63
        Squat the Fat Off

        Here's what you need to know...

        • Finishers build muscle, test work capacity, shred fat, and build mental toughness.
        • These challenges are all based on variations of the squat: the goblet squat, back squat, and front squat.
        • Plan carefully for extra recovery time and decreased training volume in subsequent workouts.
        • Walk the line between stimulation and annihilation. Finishers are meant to stimulate your body, not force you into physical therapy.


        Why Finishers?

        Like any smart lifter, your goal isn't to crush yourself every time you hit the gym. Rather, you follow a program tailored to your goals and restrictions 90% of the time. Random challenges for the sake of being a training sadist are a surefire way to stay injured and small.
        That said, the periodic throwdown of epic finishers offers a mental and physical challenge to test your mettle and see how tough you really are. Not only that, they might be just the tool you need to mentally conquer a training plateau or stagnant muscle growth.
        The following finishers are all based on variations of the squat: the goblet squat, the back squat, and the front squat. That way, you'll be able to schedule a finisher regardless of your equipment or preferred method of squatting.
        Just be sure to save these finishers for the end of your training program when you have plenty of time to dedicate to recovery.

        4 Benefits of Squat Finishers

        1. They Build Muscle

        Squat finishers kick-start muscle growth because they create massive amounts of metabolic stress and muscular damage to a large part of the body. As a result, there's an increase in tissue damage and the migration of satellite cells in muscles.
        In other words, a concentrated dose of dense training creates a metabolic environment to get you jacked.

        2. They Test Work Capacity

        By completing more work in less time, you force the muscular, aerobic, and anaerobic systems to adapt. I don't recommend finishers on a regular basis, but the occasional test provides one hell of a cardiovascular challenge that goes a long way in taking care of the conditioning you've been neglecting.

        3. They Shred Fat

        High intensity interval training (HIIT) is a superior method of fat loss compared to steady state cardio. Any oxygen that's lacking during HIIT must be repaid post-workout with exercise post-oxygen consumption (EPOC), thus keeping your metabolism elevated for hours after your workout.

        Related:  More on HIIT training

        Basically, you bust your ass for a few minutes to get shredded as your body continues to burn fat hours after exercise.

        4. They Build Mental Toughness

        To be blunt, you can't be a little punk and get great results in anything in life. Few lifters actually train as hard as they think and as a result, wonder why they're not getting bigger, leaner, and more athletic. Finishers aren't for the weak minded or faint of heart – they take some serious balls and effort.
        Finishers require you to embrace the suck, to relish the challenge and push through physical and mental barriers. Beyond the physical benefits, finishers build a toughness that provides the confidence and edge to become victorious in all aspects of life.

        The Squat Finishers

        Easiest: The Goblet Iso Challenge

        When loaded heavy, the goblet squat is a brutal exercise that challenges the strength of your legs, anterior core, and upper back. Add in an iso-hold on the front end and you have a battle for the ages.
        • Grab a dumbbell or kettlebell. Between 40-80 pounds is plenty for seasoned lifters.
        • Hold it at chest height and descend to the bottom position of your squat and hold for 15 seconds.
        • After 15 seconds, stand up to full extension and perform as many full goblet squats as possible, up to 15 reps.

        Related:  How to perform the goblet squat

        Start with 40 pounds until you complete the full iso-hold plus 15 reps, at which point you increase the weight by 5-10-pound increments in subsequent workouts.
        Form is still the determining factor – if you find you're not hitting full depth and/or the form falters, lower the poundage and continue working at it.
        Completing a set with over 65 pounds shows impressive mobility, stability, mental toughness, endurance, and balls that clank when you walk. (Or, you know, whatever sound ovaries make...)

        Hard, But Not Hardest: Back-Squat Rep Challenge

        While any chump can bench presses, the squat takes years of dedication, hard work, and toughness. Combine moderately heavy weights and high reps and you put some distance between you and the cubs pretty quickly.
        Loading: Beginners should probably let this one go. You need to live so that you can fight another day. That being said, even tough mothers should refrain from pushing weights much higher than 275 pounds, regardless of your strength levels.

        The weight you use should be between 40-65% of 1 RM and you'll be shooting for as many reps as possible – up to 50 if you're a monster.

        Squat max of 135 pounds or below: Stop reading and go get stronger. You have no business doing finishers.
        Squat max of 185-225 pounds: Use 135
        Squat max of 225-315 pounds: Use 185
        Squat max of 315+ pounds: Use 225
        Squat max of 465+ pounds: Use between 225 and 275

        How To Do It: Set the safety racks at parallel, grab a spotter, and gear up with any equipment you generally use. Load up, un-rack, and get to work.

        1. Rep out as many reps as possible without racking the weight.
        2. Pause, breathe deep, and refocus, but the minute you rack the barbell the test ends.
        3. Perform reps until you near technical failure or when you can no longer reach proper depth.

        Anything over 25 reps is good, while 35 is great and 50 reps is superhuman. Re-visit this test every few months to finish out a training cycle and compare your strength levels.

        Hardest: Countdowns for Killers

        Countdowns are a brutal but popular training method to increase training density. When applied to the front squat, you have a recipe for total body strength and mass development.

        Loading: Use 65-70% of your front-squat training max (75% of 1 RM is approximately your 10-rep max).
        For example: Front Squat Max = 305

        Weight used: Between 195 and 215 pounds

        If you don't know your front-squat max, take your back-squat max and cut it in half. That'll be plenty.
        How To Do It: The goal is simple: Pyramid up from 1 to 10 reps using 15-30 seconds of rest. It would look like this:

        Set 1 – 1 rep
        Rest 15-30 seconds
        Set 2 – 2 reps
        Rest 15-30 seconds
        Set 3 – 3 reps
        Rest 15-30 seconds
        Set 4 – 4 reps

        Continue until you hit a set of 10 reps.

        At first, the 15-second rest periods will feel relatively easy. By sets five and six, you'll need to increase rest periods to 30 seconds as your lungs battle to keep up and your body starts to tremble.
        Suck it up and push on. Completion of this finisher is grounds for a parade of bacon and steaks.

        Related:  More brutal finishers

        When it's all said and done, 55 reps with a 10-15 rep max in four minutes time is an insane muscle-building stimulus and test of your training prowess.

        When To Do Finishers

        Finishers are an advanced method that require planning, programming, and extra recovery methods. Keep the follow points in mind before diving into one of these:

        • While finishers can be done as a stand-alone workout, focus on a lower body strength movement before doing a finishing exercise.
        • Finishers fit best at the end of a training microcycle as an intensity-boosting method before deloading. This way, you won't crush your performance.
        • Decrease training volume of accessory lifts on the lower body before jumping into a finisher. This ensures you're not jumping into a finisher with a lot of fatigue.
        • Finishers work well if you're short on time and need to maximize training in a short window.
        • Plan on additional soft-tissue work, meals, and any of your preferred recovery methods to combat soreness.
        Skeggǫld, Skálmǫld, Skildir ro Klofnir.

        Comment


        • #64
          https://www.youtube.com/watch?v=-rh3MHnRI_I

          https://www.youtube.com/watch?v=4AObAU-EcYE

          https://www.youtube.com/watch?v=g2tyOLvArw0
          Skeggǫld, Skálmǫld, Skildir ro Klofnir.

          Comment


          • #65
            How To Squat. Layne Norton's Squat Tutorial.

            Dr. Layne Norton has spent years refining his squat technique. Follow his coaching tips and cues, learn how to squat, and you someday could be the proud owner of monster legs!

            I used to be that guy with chicken legs. Why? Because I didn't squat. I made up every excuse I could think of to get out of squatting: they're bad for the knees, they're bad for the back, they're hard. I escaped squats by doing every other leg exercise I could think of, but my legs were still tiny.
            One day I had an epiphany. I was sick of having little legs, so I made a goal to squat over 500 pounds for reps. I assumed that amount of weight would give me the big legs I wanted. After years and years of work and learning proper technique and programming, I did squat over 500 pounds for reps. Today, my one-rep max (1RM) is 655 pounds. I'm happy to report that, after all that work and all that weight, my legs are no longer twigs.
            If you want big legs, there's one rule: you gotta squat! Don't go running to the nearest rack without watching this video first. I'm going to teach you tips and techniques I've learned over the years from working with some of the top coaches in the world, guys like powerlifter Ben Esgro, USAPL World Team Head Coach Matt Gary, and Dr. Mike Zourdos. They will help you squat big weights more safely and effectively

            LAYNE NORTON SQUAT TUTORIAL
            [COLOR=#5A5A5A !important]WATCH THE VIDEO - 16:43
            [/COLOR]


            HOW TO SQUAT EVERYTHING YOU NEED TO CONSIDER


            1
            EQUIPMENT


            Equipment can make a big difference in your squat performance, especially when you're under a lot of weight. Here are a few things you can put on that can make you a better squatter.

            FOOTWEAR

            The purpose of a tennis shoe is to distribute your weight evenly and to cushion your foot. But, in a squat, you're pushing down against the earth. Physics dictate that the earth presses back up. If you use a cushioned shoe, you'll lose some of that energy transfer. It's also going to make you unstable. Those of you who do squat in sneakers may find that your knees cave in and that you feel wobbly.


            At minimum, you need to use a hard-soled shoe. Converse All-Stars are a great choice. I also like weightlifting shoes. The great thing about weightlifting shoes is that they have a hard sole and an elevated heel.

            The elevated heel puts you in a more ergonomic position for squatting, allowing you to push of your heel and mid-foot better.

            BELT

            A sturdy weight belt can make a huge difference in your squat. A good belt will give your core something to brace against, will protect your lower back, and will keep you more upright.


            The rumor that wearing a belt will weaken your core is just plain wrong. Research shows that wearing a belt will actually give you more core activation because it provides your core with something to push against.1,2

            Most people wear their belts too low. A lifting belt doesn't go around your waist, but around where your abdominal wall will push out. So, find where your abdominal wall pushes out, and then put your belt around that area.
            I recommend buying a sturdy, buckle belt that's at least 10-13 millimeters thick and 4 inches wide.

            KNEE WRAPS OR SLEEVES

            Knee wraps and sleeves help keep your knees warm and provide some extra support. I prefer knee sleeves to wraps because they're quicker and easier to get on and off, and there's some evidence that wraps can put too much pressure on the patella.


            I also like to know that it's me moving the weight, and that I'm not getting a PR because of knee wraps.

            CHALK

            Most of you are used to using chalk on your hands. Chalk wicks away moisture so you can get a better grip on the bar. Because the bar is sitting on your shoulders during a squat, however, you don't really need it for your hands.
            However, in a low-bar squat, chalk can help keep the bar on your back and keep it from rolling. So, I recommend getting a block and chalking your back before you squat, especially if you're going heavy.

            WRIST WRAPS

            For those of you who do high-bar squats, wrist wraps may not be necessary. But for those who prefer the bar in a lower position, wrist wraps can be helpful. Wrist wraps help keep your wrist straighter and can help prevent wrist and elbow pain.3


            One mistake people make with wrist wraps is that they wrap too low. You want to wrap above and below the wrist joint to provide more support. The wrap should actually go around the lowest part of your palm.


            2
            EXECUTION


            When it comes time to squat, a lot of people get under the bar and just go for it. This is a mistake. You should have a repeatable plan for getting under the bar and stepping out.

            THE SETUP

            Before squatting for broke, get yourself under the bar and get the bar in the proper position on your back. Remember, your mid-foot is your center of gravity, so you want the weight to be over your mid-foot. Take a deep breath in. Squeeze your glutes forward to get the bar off the rack.
            Now that you've unracked the weight, it's time for the walk-out. I like the three-step approach because it's efficient, simple, and repeatable. Once you unrack the weight, let it settle. Don't immediately start walking back. When you're ready, take a small step back with one foot. When that foot settles, take a step back with the other foot. Then, move that first foot to line it up with the second foot.
            Once your feet are in position, you can adjust your feet a little to make sure they're even. I don't recommend a super narrow or a super wide stance. Position your feet as if you were going to do a standing jump.


            REMEMBER, YOUR MID-FOOT IS YOUR CENTER OF GRAVITY, SO YOU WANT THE WEIGHT TO BE OVER YOUR MID-FOOT.

            It's also important that you don't point your toes too far out. If they're anywhere near 45 degrees, they're too far. An easy way to find out where your feet should be is this: Once you've unracked the bar and are in your stance, squeeze your glutes. That should move your toes where they should be.


            BREATHING


            Most people don't take in nearly enough air when they lift heavy. Before you squat, pretend like you're taking your last breath before the whole room fills with water. Breathing in deeply will help brace your abdominal wall and activate those deep ab muscles. Holding your breath will also help you maintain spine neutrality.
            Once you've taken a deep breath, push your abs out without breathing out. Don't think about flexing your abs, but rather think about pushing with your abdominal wall. How would you prepare for a punch? You would brace. Do the same
            when you squat. Your abdominal wall is what stabilizes your lower back. So make sure you're bracing.

            HIP DRIVE

            The squat isn't only an up and down movement; it's also a back and forth movement. Once you have your air in, your core braced, and your glutes engaged, start by driving your hips back. Sit down between your legs.
            By using your hips, glutes, hamstrings, and lower back, you're recruiting the biggest, strongest muscle groups on your body. Once you hit depth, if you're braced correctly, you should start to come back up naturally.
            As you start coming up, don't just think driving up. Think about squeezing your glutes and bringing your hips forward. Even if you're halfway up in a squat, you can lock it out by just thinking about driving your hips forward instead of standing up.
            When you finish the squat, squeeze your glutes so your spine and your hips are aligned perfectly under the bar.

            KNEES

            As you sit down between your legs, drive your knees out over where your toes are pointed. Don't allow your knees to collapse in or shoot forward. If you lead with your knees in a squat, your calves will tighten and it will cause you to lean forward. If you're leaned forward too far, you could be in danger of spinal flexion, which is super dangerous in a squat.
            Leading with your knees can also cause you to stop well short of proper depth. In order to maximize gains in strength and hypertrophy, you want to take the exercise through the entire range of motion.


            AS YOU SIT DOWN BETWEEN YOUR LEGS, DRIVE YOUR KNEES OUT OVER WHERE YOUR TOES ARE POINTED. DON'T ALLOW YOUR KNEES TO COLLAPSE IN OR SHOOT FORWARD.

            BACK ANGLES

            I hear a lot of coaches tell their athletes to stay upright during a squat. That's true, but only to an extent. You want to stay upright, but the angle will changedepending on your structure. If you have long femurs and a short torso, you'll need significantly more forward lean to achieve depth and to keep the bar over you mid-foot. Someone with shorter femurs and a longer torso will be able to stay more upright.
            Regardless of how far you lean forward, it's essential to maintain spine neutrality. Spine neutrality means that your back is straight, even if you're leaned forward. The danger occurs when your spine caves forward and rounds.

            DEPTH

            Proper depth happens when your hip joint goes slightly below your knees. I think you should squat as deeply as you safely can. People with longer limbs won't be able to go as far down without losing neutrality. But, almost everyone can learn to do a good, below-parallel squat.

            BAR PATH

            As you travel down and up, the bar should stay in one line directly above your mid-foot or close to it. That way, the bar is directly over your center of gravity and you get them maximum force transmission from your feet to the bar.


            AS YOU TRAVEL DOWN AND UP, THE BAR SHOULD STAY IN ONE LINE DIRECTLY ABOVE YOUR MID-FOOT OR CLOSE TO IT.

            Even if you have a really good squat, the bar path may not be completely straight. That's OK. Keep in mind, though, that the fewer deviations you have from straight, the more efficient and easier the movement will be.
            3
            BAR POSITION


            Most of you are probably comfortable with the bar sitting on top of your trapezius muscles. For some people, a high-bar squat can be easier to do while staying upright. It's also a little more comfortable. Others, however, prefer a low-bar squat.
            In a low-bar squat, the bar sits about two inches below your traps on top of your rear delts. This position is a little more uncomfortable because your shoulders are bunched up. But one huge advantage to the low bar position is that the majority of people will be more powerful. With the bar in a low-bar position, you'll have to start out with a little more forward lean, but you should be able to maintain a more neutral spine as you descend.


            WITH THE BAR IN A LOW-BAR POSITION, YOU'LL HAVE TO START OUT WITH A LITTLE MORE FORWARD LEAN, BUT YOU SHOULD BE ABLE TO MAINTAIN A MORE NEUTRAL SPINE AS YOU DESCEND.
            To put the bar in a low position, grab the bar as narrowly as you comfortably can. Then, put the bar on top of your traps like you would to do a high-bar squat, but let it slide it to the next shelf down. You'll feel the bar catch. That's your position.

            How do you know which is better for you? I recommend trying both. But, in general, people with shorter legs and longer torsos may be better able to do a high-bar squat, whereas people with longer legs and shorter torsos may be better in the low-bar position.

            REFERENCES

            • Zink, A. J., WHITING, W. C., VINCENT, W. J., & MCLAINE, A. J. (2001). The effects of a weight belt on trunk and leg muscle activity and joint kinematics during the squat exercise. The Journal of Strength & Conditioning Research,15(2), 235-240.
            • Lander, J. E., Hundley, J. R., & Simonton, R. L. (1992). The effectiveness of weight-belts during multiple repetitions of the squat exercise. Medicine and science in sports and exercise, 24(5), 603-609.
            • Coutinho, M. The Wrist wrap as a protective and performance enhancing device in powerlifting.


            Skeggǫld, Skálmǫld, Skildir ro Klofnir.

            Comment


            • #66
              https://www.youtube.com/watch?v=ZxD05t7qlHQ
              Skeggǫld, Skálmǫld, Skildir ro Klofnir.

              Comment


              • #67
                Is Sitting Really Bad For You?

                Sitting has recently been called ''the new smoking.'' Is sitting really killing you? Get the truth, and what you can do about it, in this article!

                In some circles of the web, the act of sitting—yes, the thing you do on your chair, which you're probably doing right now—has come under intense fire. In fact, sitting has been pinned as the culprit for modern society's poor state of health. It's essentially an extension of the stance that a sedentary lifestyle—exacerbated by a 9-5 desk job—is associated with developing cancer, heart disease, type 2 diabetes, and a number of depressing ailments we don't want.
                In order to remedy "too much sitting," people are now rushing to get standing desks and ergonomic chairs, or hosting ergonomic "classes" for their employees, in an attempt to fix our collective "sitting problem." It's time to stop the madness!

                Sitting itself is not going to kill you, but simply switching to a standing desk won't save your life, either. Why? Because sitting is not the main problem. If you were about to do jumping jacks, just sit down on your hot bottom for a minute so we can get to the bottom of this hot issue.

                DON'T PUT SITTING DOWN

                First, the connection between sitting and death is bold, and quite frankly, rather weak. The radical claim that sitting is killing you only serves to incite fear without giving proper context. If sitting is killing you, then "sitting" refers to an overall lack of movement, regular exercise, a predominantly sedentary lifestyle, and general lack of variety in the way we move our bodies every day.

                Actual sitting comprises only one variable in your day, which by itself won't make or break you. Just like there is no one way to exercise, build muscle, or lose weight, there's no one way to address the problem of sitting too much. Sure, a standing desk or ergonomic chair can definitely add to your daily movement total, but you have to look at the grand scheme of things—at your environment and your body in relation to the environment—and then temper it with a heavy dose of practicality.

                For example, is sitting on an exercise ball any better than sitting on a chair if you're slouched over and experiencing more aches and pains than ever? Obviously not. Is standing all the time better than sitting occasionally? Quite frankly, no, because there is no optimal position for the body—not even standing. Your body merely responds to the variety of positions and movements you put it through.

                VARIETY IS KING

                You probably already sit in a variety of positions: slumped back, legs resting on the table, maybe even leaning to one side. Rather than changing things you cannot control—your job or your environment—you can easily change your sitting (or standing) position with regularity. That includes getting up as often as possible to grab some coffee or water, or to just go talk to a coworker.
                If you have a desk job, adding variety to your sitting (or standing) positions rather than stubbornly clutching onto a "sitting is bad" mentality can lead to bigger changes over time. To be clear, a standing desk alone does not give you variety in movement. Neither does merely sitting with better posture. Variety of movement is essential.

                As for the benefits of ergonomic chairs? Stuart McGill, Ph.D., a professor of spine biomechanics at the University of Waterloo (Waterloo, Ontario, Canada) isn't opposed to them per se, but he recommends caution: "Use an ergonomic chair, but use it properly. Many people think that they should adjust their chair to create the ideal sitting posture. This may be ideal sitting posture, but for no longer than 10 minutes."1

                Your work may require sitting for longer than 10 minutes at a time. While a more active job may be considered "ideal," Paul Ingraham, a massage therapist and science writer at Painscience.com recommends the following: "For all of you, 'microbreaking'—taking small, regular breaks—is the most important new concept in ergonomics. Stop worrying as much about [how] your workstation is arranged, and start thinking about how you use it!"2

                Why is it simply more effective—not to mention practical—to frequently change your sitting position? Quite simply, sitting in a certain position is a load on your body—a stress, even—so it's crucial to vary that load to avoid placing undue strain on specific joints for extended periods of time.

                THE CURE FOR DESK JOCKEYS

                So we've gotten one thing clear: Sitting by itself isn't the main problem. The problem is actually a lack of variety in your body's position.
                When we translate this stuff to the real world and our jobs, it's tough to apply these "do this one simple trick" mantras for the majority of people. Instead, I'd like to suggest five things you should keep in mind as you're pounding away at your keyboard at work or sitting and reading an article like this one.

                Switch up your sitting position, or alternate between different pieces of furniture. Heck, find a different location in the office altogether if you can manage it.

                Set a timer to get up to do something—anything—every hour, and create a ritual for yourself. If you want to get up more and make it a habit, connect it to something you already do regularly, like going to the bathroom, grabbing stuff from the break room, or making a trip to the water cooler.

                Create a set of personal "rules" directly related to tasks you do every day. For example, if you have regular calls, don't sit at your desk; use a headset or speakerphone and pace around or stand for every call. Have regular colleague meetings? Request that you walk together as you talk, or even hold a standing meeting. The secret here is to evaluate your existing practices and incorporate variety as seamlessly as possible.

                Remember that daily movement isn't just working out in the gym. Can you park farther away from the store or office? Can you take the stairs? Can you wear more comfortable shoes that allow you to stand for longer periods of time? I can continue to fire off suggestions, but it's important to evaluate your own situation and identify what can be done to increase your daily activity.

                No, not the mistletoe kind. This is shorthand for "Keep It Simple, Stupid!" K.I.S.S. can help you figure out the simplest ways to remove your body from the dangers of being too sedentary. You don't have to do elaborate tumbling acts every 15 minutes. Just get up every hour, walk around, and keep your activity simple!

                NOW RISE UP!

                Your sedentary job is not a death sentence, but a long-term lack of action can be. Whether you feel the effects of a sedentary lifestyle in 10 years or 50, the quality of your life is in your hands—or rather, on your bum. Get up and use the body you were given!

                REFERENCES

                1. Katzmarzyk, P. T., Church, T. S., Craig, C. L., & Bouchard, C. (2009). Sitting time and mortality from all causes, cardiovascular disease, and cancer. Medicine & Science in Sports & Exercise 41(5), 998-1005.
                2. McGill, S. (2007). Low back disorders: evidence-based prevention and rehabilitation. Human Kinetics.
                3. Ingraham, Paul. "Posture Correction: Does It Matter?" SaveYourself. 1 Jan. 2013. Web. 20 Nov. 2014. <http://saveyourself.ca/articles/posture.php>.


                [/COLOR]
                Skeggǫld, Skálmǫld, Skildir ro Klofnir.

                Comment


                • #68
                  No-Weights Calf Training

                  Here's what you need to know...

                  • You should be able to perform 20 single-leg calf raises through a full range of motion while standing flat on the ground.
                  • This is the normative strength value for the average person off the street, but most lifters can't even come close.
                  • To determine your initial strength level, first perform one set of single-leg calf raises for each leg for as many reps as possible.
                  • Perform 3 sets of as many reps as possible with each leg, holding for 2 seconds at the top, spread throughout the day. Do this every day for two weeks.
                  • The final goal is to achieve 10 perfect, unassisted single-leg calf raises with a 2-second peak contraction hold at the top of each rep.


                  You Don't Need Machines or Dumbbells

                  The vast majority of lifters out there don't need machines, weights, or any contraption to build their calves.
                  If you're a male that can perform eight reps of a single-leg calf raise with a 50-pound dumbbell at your side, I can almost guarantee that you're using accessory knee or trunk movement to accomplish the task and/or your peak height of plantar flexion is lower than it should be.
                  How do I make these claims? Experience. I've stumbled upon a training approach that's produced the most impressive calf development that I've seen. Furthermore, the plan requires no equipment and you can do the sets literally anywhere.

                  How Do You Measure Up?

                  Part of my Doctor of Physical Therapy (DPT) training covered normative strength values for every muscle group. Weakness is a huge component of dysfunction so it makes sense that any good DPT should know how to determine if a muscle is too weak.
                  When it comes to the calves – mainly the gastrocnemius and soleus muscles – you should be able to perform 20 single-leg calf raises through a full range of motion while standing on the ground.
                  Importantly, the test stops if your knee bends even the slightest or if you can't elevate your body as high as the previous rep. Balance is maintained with just the fingertips of one hand against a wall or chair.
                  Seems simple enough, right? I mean, those calf raises are just performed from the floor. You don't have to perform them off the edge of a step that requires ankle to dorsiflex past 90 degrees, which would greatly increase the demand on the plantar flexors.
                  I tested my calf strength as it relates to the physical therapy world and this is how I measured up:
                  Right single-leg calf raise: 12 reps
                  Left single-leg calf raise: 14 reps

                  I wasn't surprised that I could do more reps with my left calf since that's the leg I jumped off of for many years while playing basketball. My left calf has always been slightly larger than my right as well.
                  However, I was surprised that I couldn't perform 20 standing calf raises with either leg!
                  Keep in mind, 20 single-leg calf raises is the normative strength value for the average person off the street. It doesn't take into account a guy that wants to build his calves to match the circumference of his upper arms – the gold standard ratio that looks the best for any hard-training guy.

                  The Relationship Between Size and Strength

                  Here's something we all know: The guy with the biggest muscles isn't always the strongest guy in the gym.
                  There certainly are genetic factors at work that allow some lucky people to sport incredibly large calves without any direct training to those muscles. Many pro bodybuilders fall into that category and that's why their calf training routines won't make your underdeveloped calves grow.
                  Genetics aside, there is a direct, scientific relationship between size and strength. There are six factors that increase muscle force, and physiological cross-sectional area (PCSA) is at the top of the list. So if you increase the PCSA you will increase the muscle's ability to produce more force.
                  Related:  More on increasing muscle cross-sectional area

                  This is how scientists determine your PCSA:
                  PCSA = muscle mass x cosine (pennation angle)/muscle density x fiber length
                  Memorizing the equation isn't important, but understanding the concept definitely is: PCSA is directly proportional to maximal tetanic tension (force) of muscle.
                  So if we reverse that statement and achieve the standard measure of calf strength in the physical therapy world, will it increase the PCSA of your calves? Yes, it definitely will!

                  My Muscle Lab

                  Since I failed to achieve 20 single-leg calf raises through a full range of motion on either leg, I wondered how my clients would do. I was shocked to discover that the people I train who want bigger calves couldn't achieve 20 single-leg calf raises either.
                  Most of the athletes I tested could only perform 7-14 reps with either leg using the technique I'll describe later.
                  Now it's obvious that trying to achieve 20 straight reps is a test of endurance strength, but it's still a strength test. It's just that the physical therapy world feels that 20 straight reps is more important than a one-rep max test for overcoming dysfunction.
                  Since the calves often respond well to higher reps due to the muscle fiber make-up, I put a group of athletes on a high frequency training (HFT) plan to overcome their strength deficit. After six weeks every guy reported that he experienced more calf growth than ever before.
                  Here's the plan I gave them.

                  HFT Single-Leg Calf Raise Plan

                  Step 1: Determine your initial strength level.
                  "If you're not testing, you're guessing" is a powerfully accurate mantra. First get an honest measure of your strength levels.
                  How to do it: Perform one set of the single-leg calf raise with each leg without shoes.
                  First, you should use the least assistance possible to maintain your balance. Try to perform 3-4 single-leg calf raises without holding on to anything to recruit your ankle stabilizers.
                  Then rest 30 seconds and perform one set to failure using nothing but the tips of your fingers against a wall or resting on a countertop, chair, etc. to maintain your balance.
                  Technique tips: You must keep your working leg locked perfectly straight with every rep. No knee flexion or trunk swaying allowed whatsoever. Terminate the set once your ability to elevate decreases – even by a smidge – compared to the rep that came before it. Make a note of how many reps you achieve with each leg.
                  Step 2: Perform 3 sets of as many reps as possible (AMRAP) with each leg, spread throughout the day. Do this every day for two weeks.
                  The muscle-building power of HFT comes from increasing the frequency that you stimulate a muscle. Therefore, the three sets should be spread throughout the day: one set in the morning, afternoon, and evening. No calf training in your normal workouts.
                  How to do it: Start with your strongest calf first because there will be neural carryover to your weaker side, thus making you stronger. Perform each calf raise slowly, drive through your big toe, and reach the highest elevation possible by squeezing your calf to peak tension for 2 seconds with each rep.
                  Related:  More on training the calves every day

                  It's best to perform the calf raise without shoes, but it's not absolutely necessary. You can do the calf raise with shoes on if you're standing in line at the grocery store or putting gas in your car. Just get the damn sets done!
                  Terminate the set once your knee flexes or your ability to elevate decreases by one inch. Rest 30 seconds between each side.
                  Technique tips: It's common for people with poor calf development to experience a calf cramp when they try to squeeze the muscle to peak tension. Cramping often occurs when there's a glitch in the neural pathway and the culprit can be an overly compressed spinal nerve root.
                  The solution here is to maintain a long spine throughout the set. Imagine there's a wire attached to the top of your head and someone is pulling up on it. This opens the intervertebral space in your spinal column and allows freer nerve transmission from your vertebrae to your muscles.
                  Step 3: After 2 weeks retest your standing single-leg calf raise.
                  Once you've completed two weeks of daily training, take one full day off from calf raises. The following day, 48 hours after your last set of calf raises, retest your standing single-leg calf raise from the floor.
                  Importantly, the test reps aren't performed the same as the work sets. The test reps are performed slowly, but there's no squeeze for 2 seconds at peak contraction. Just perform a normal set of as many reps as possible.
                  If you still fall short of the 20-rep mark, continue with the plan for two more weeks and retest again. Or maybe you achieved 20 reps on your right, but only 17 on your left, smaller side. You could continue with the plan for one more week for your left calf only and retest. There are many options here that make sense, so use your own best judgment.
                  Step 4: Progress to a standing single-leg calf raise with no balance assistance.

                  Now, let's say you can perform 20 perfect single-leg calf raises with each leg. Your next mission is to perform all reps using absolutely no balance assistance – zero, zilch, none!
                  It'll be very frustrating at first because you'll be wobbling like a drunkard. However, the increased neural drive to your calf and ankle will recruit more muscles and motor units.
                  Just look at the calf development of any ballet dancer and you'll have real-world proof that unassisted calf raises from the floor will do wonders for your calf girth.
                  Your goal is to achieve 10 perfect, unassisted single-leg calf raises with a 2-second peak contraction hold at the top of each rep. That's how you reach a level of calf development beyond the physical therapy norms.
                  Full disclosure: This can takes months to accomplish. However, in pursuit of that goal I bet you'll add more calf mass than ever before.
                  Skeggǫld, Skálmǫld, Skildir ro Klofnir.

                  Comment


                  • #69
                    Interessant stuk.
                    Zeker het proberen waard voor degenen met 'kuitgroeiproblemen'.
                    DIVIDE ET IMPERA

                    Comment


                    • #70
                      9 Best Deadlift Tips

                      Here's what you need to know...

                      • To build the deadlift, prioritize the squat for 6 weeks while not pulling heavy at all.
                      • Powerlifter Dan Green's number one deadlift tip is to regularly perform the stiff-leg deadlift.
                      • Mike Tuchscherer recommends building the deadlift by pausing at the bottom of the lift, around an inch or two off the ground.
                      • For many lifters, deadlift strength is limited by what they can hold. Strengthen your grip to pull more.
                      • Konstantin Konstantinovs builds grip strength by holding the top position during the last rep of the heaviest set of deadlifts.
                      • Tom Martin recommends improving the deadlift by setting up so your hips are in the same position they'll be in when the bar actually leaves the ground.


                      1. At Times, Prioritize the Squat

                      This may seem counterintuitive, but the squat keeps your deadlift in check. If you only deadlifted and never squatted, your hips would eventually shoot up and your deadlift would become too hip dominant.
                      Your quads need to be very strong in a deadlift as they obviously help you drive with the legs, initiate the pull with a lower hip position, prevent the torso from being too horizontal at lift-off, and prevent excessive rounding.
                      For six weeks, try squatting heavy three times per week. During this time, don't deadlift heavy at all. Instead, do dynamic effort (speed) pulls with 60-80% of 1RM for 3 sets of 1-3 reps.
                      Think this strategy sounds absurd? Think again. Many powerlifters find that after following intensive squatting protocols such as Smolov or The Russian Squat Routine, their deadlift strength increases.
                      Related:  More on the Smolov routine

                      But don't rely on this strategy year round. If you want to maximize your deadlift strength, you'll definitely have to push the deadlift at strategic points throughout the year.

                      2. Utilize Variety

                      Talk to 100 powerlifters about their favorite deadlift assistance exercises and you'll get 100 different answers. Every lifter has particular weaknesses that can be strengthened through different assistance lifts.
                      For example, some lifters are markedly stronger on rack or block pulls than they are from the floor, while other lifters are actually weaker when pulling off of 3-4 inch blocks. Lifters who are weaker from a shortened range of motion tend to get more out of partials than lifters who are stronger with partials.
                      Here are some of the exercises that you'll typically hear strong lifters credit for helping them build their deadlift:
                      • Front squat, low box squat, safety bar squat, Bulgarian split squat, leg press
                      • Deficit deadlift, block pull, stiff-leg deadlift, pause deadlift, Dimel deadlift
                      • Good morning, cambered bar good morning, safety-squat bar good morning
                      • Barbell hip thrust, single-leg hip thrust, barbell glute bridge
                      • Glute ham raise, back extension, reverse hyper, kettlebell swing, pull through

                      Experiment with these exercises to figure out what works best for you. In addition, make sure to utilize a variety of rep ranges. I asked powerlifter Dan Green for his number one deadlift-building tip and he recommends that you regularly perform the stiff-leg deadlift.
                      Dan does them while standing on a 4-inch block for added hip range of motion and his best lift for the stiff-leg deadlift is 615 pounds x 6 reps.

                      3. Utilize Specificity

                      This tip contradicts the first two, but don't get hung up on that. While the first two tips recommended relying on squats and variety to build your deadlift, this tip recommends ultra-specificity.
                      For a six week period, pull heavy twice per week:
                      1. Spend two weeks doing 3 sets of deadlifts for 5 reps.
                      2. Then spend two weeks doing 3 sets of deadlifts for 3 reps.
                      3. Followed by two weeks doing 3 sets of deadlifts for 1 rep.

                      During this time, don't squat heavy at all. Do dynamic effort (speed) squats with 60-80% of 1RM for 3 sets of 3 reps.

                      4. Master the Opposite Stance

                      If you pull sumo, focus on building up your conventional strength for a couple of months. If you pull conventional, spend a couple of months building up your sumo strength.
                      Related:  Master the Sumo Deadlift

                      The two styles can feed off of each other, and you don't want a huge imbalance between conventional and sumo deadlift strength anyhow. In addition, you should incorporate the semi-sumo stance (medium width) deadlift from time to time.

                      5. Perform Pause Deadlifts

                      Pause reps are the weapon of choice for top powerlifter Mike Tuchscherer. He pauses at the bottom of the lift, around an inch or two off the ground. However, you can pause anywhere you'd like, like right below the knees or right above the knees. You can also pause twice throughout the ROM.
                      Related:  More on double-pause deadlifts

                      Pause deadlifts require discipline since it's quite uncomfortable and challenging to hold proper positioning while pausing in the middle of a rep.

                      6. Get Strong Off the Floor

                      You can never be too strong off the floor. The stronger your starting strength, the faster you'll be moving the bar through the sticking region, which will improve your chances of achieving lockout.
                      Moreover, the better you can hold proper position off the floor, the easier the lockout will be.
                      What seems to improve deadlift strength off the floor varies from one lifter to another, but some options include dynamic effort deadlifts, pause deadlifts, deficit deadlifts, snatch-grip deadlifts, back squats, front squats, Bulgarian split squats, and leg presses.

                      7. Increase Lockout Strength

                      You won't always pull the bar off the ground in perfect position, and your bar path won't always be solid, either. In these situations, the lockout will be markedly harder to achieve.
                      Moreover, when maxing out, a large percentage of lifters will find that their spinal position buckles slightly prior to liftoff, thus making the lockout harder to achieve. So, you'll want your lockout strength to be as strong as possible.
                      What improves deadlift lockout strength varies from one lifter to another, but some options include banded deadlifts, chain deadlifts, American deadlifts, block pulls, barbell hip thrusts, barbell glute bridges, and weighted back extensions.

                      8. Strengthen Your Grip

                      Some lucky lifters naturally possess insanely strong grip strength. They never have to train their grip specifically. Their grip gets strong from doing deadlifts and performing upper-body work such as dumbbell exercises, shrugs, and chins.
                      Other lifters aren't so lucky. Their deadlift strength is limited by what they can hold. When they use straps they're markedly stronger, and due to their poor grip strength, their muscles seem to shut down – the hip and knee extensors just won't maximally activate.
                      Strengthening the grip will improve confidence, increase muscle activation throughout the entire body, and allow for greater acceleration off the floor.
                      Perform any of the following exercises to strengthen your grip: farmer's walks, Kroc rows, static hangs, static barbell holds, shrugs with a double overhand grip, bent-over rows with a double overhand grip, bench squeezes, and/or grippers.
                      Related:  Grip Training for the Deadlift

                      Another option is to simply hold the top position for extended time during the last rep of your heaviest set of deadlifts. Powerlifter Konstantin Konstantinovs likes to do this, and clearly it works for him.

                      9. Focus on Technique

                      You may have heard that in order to improve your deadlift, you need to strengthen a particular muscle such as your glutes, quads, hamstrings, or erectors. But you may find that you get more out of working on techniquerather than performing isolation/targeted movements for a particular muscle.
                      For example, powerlifter Chris Duffin provides the following advice: "If you're asking yourself whether you need to build a stronger low back to improve your deadlift, you need to look instead to your technique."
                      In other words, rather than performing various spinal extension or targeted back movements, just work on pulling with a solid arch over and over until it becomes automatic.
                      The muscles will eventually get strong at the proper lengths, and the nervous system will memorize the motor pattern. This strategy requires patience and consistency, but it pays dividends over time.
                      Likewise, make sure the bar skims your legs during the deadlift – it should never be more than an inch away from the shins or the thighs throughout the entire concentric and eccentric range of motion.
                      Another excellent piece of advice comes from powerlifter Tom Martin:
                      "Don't try to pull from an overly optimistic start position. Set up so that your hips are in the same position they will be in when the bar actually leaves the ground. If you set up with your hips so low that they shoot up 10" before the weight actually moves, you will a) be pulled into a position you didn't get tight in, and b) lose a lot of speed off the floor."

                      Skeggǫld, Skálmǫld, Skildir ro Klofnir.

                      Comment


                      • #71
                        Eat Big and Gain Nothing But Muscle

                        Here's what you need to know...

                        • What you eat will either be used by muscle or stored as fat. This process is called nutrient partitioning.
                        • If your body partitions nutrients well, they'll go to muscle. If it doesn't, count on gaining 2 to 3 pounds of fat for every pound of muscle you try to build.
                        • If you're a good nutrient partitioner, almost every calorie burned comes from stored body fat and not muscle. If you're not a good nutrient partitioner, you could lose a pound of muscle for every few pounds of fat you lose.
                        • The good news is, you can acquire the ability to partition nutrients effectively by using a few simple strategies.


                        Bad Genetics? Here's What You Can Change

                        Do you know anybody who's built? I mean really built? One of those rare people who's a mix of chiseled granite, flesh, and comic-book superhero?
                        Almost every calorie these gifted men and women eat goes straight to muscle. If, for some reason, they feel the need to diet, every calorie burned comes from fat and not muscle. No matter how they train or eat, they get better and better with rounded muscle bellies and low body fat levels.
                        You? Ha! When you eat for mass, you gain 2 to 3 pounds of fat for every pound of muscle. And when you cut calories, you lose a pound of muscle for every 2 to 3 pounds of fat you drop.
                        The difference between you and them is largely genetic. Testosterone levels and sensitivity play a role, as do cortisol levels. The gifted folks also have thyroids and nervous systems that operate with the efficiency of a German automobile engineer whose papa never gave him any approval.
                        Another hugely significant advantage possessed by the gifted has to do with how well they partition nutrients, which, luckily, is a gift you can acquire, too.

                        Not All Calories Are Treated the Same

                        Nutrient partitioning is the process by which the body decides what to do with the energy you get from your diet.
                        When you eat something, the nutrients are either burned or they're stored for future use. Ideally, you'd like all those storage nutrients to be partitioned to muscle as opposed to body fat.
                        That's why the old statement that "a calorie is a calorie" isn't really true, at least in the way that calorie is treated by the body.

                        If nutrients are partitioned to muscle, you can potentially fuel new muscle growth and build up muscle glycogen stores so that even more growth, along with increased work capacity and increased recovery rates, is possible.
                        Efficient nutrient partitioning has lots of fathers, among them an unexplained coordination between the gut, liver, brain, central nervous system, and muscles, most likely coordinated by hormones and certain secondary chemical messengers.

                        The main determinant of nutrient partitioning is insulin.
                        Now if you're diabetic or obese, your ability to partition nutrients is likely dysfunctional. And if you're just a bit insulin resistant, your nutrient partitioning is sluggish and inefficient.

                        Related:  Control the Damage from Overeating

                        Insulin will still try to get into the muscle cells of insulin resistant people by making contact with a receptor on the cell, but its intents are ignored.

                        Normally, insulin would activate this particular protein called GLUT4, which allows glucose to enter the cell. But in insulin resistant people, GLUT4 doesn't take the call, so glucose (along with any branched-chain amino acids insulin might be carrying) doesn't get into the cell.

                        Insulin then has the unwanted glucose converted into fatty acids which are trundled off to fat storage centers like your belly or love handles where they're stacked on the existing pile of fat.

                        But if you're insulin sensitive, carbs and branched chain amino acids are delivered Fed-Ex style to the muscle cell, where a beautiful GLUT4 lady of the house signs for them and ushers them inside where they're greedily taken up by the machinery of the cell and forged into brand-spanking new muscle – provided you actually work out correctly.

                        Gifted People Vs. Angry Skinny-Fat People

                        You get the picture of the haves and have nots. On one hand we have genetically perfect guys with idealized nutrient partitioning abilities and on the other, skinny-fat guys who war against the genetically perfect guys.
                        The truth is, everybody's nutrient partitioning abilities lie somewhere along a huge spectrum. Even the hypothetically perfect nutrient-partitioning people can suffer a setback if they eat too many carbs.

                        Related:  The Eat as Much as You Want Diet

                        If that happens, they'll experience some of what insulin resistant folks experience every day in that all the extra glucose will be converted to fatty acids and stored as triglycerides in fatty tissue.
                        Regardless of which part of the spectrum you're on, you can do things to improve your nutrient partitioning capabilities.

                        Become a Gifted Nutrient Partitioner

                        The traditional remedy to poor nutrient partitioning abilities is to pay attention to the type of carbohydrate you're ingesting and when you're ingesting it. You've heard it many times: eat fast-absorbing carbs during the peri-workout phase. Eat small amounts of complex carbs the rest of the time.
                        Likewise, you've always been told to limit your overall carb intake, because even in gifted people with exquisite insulin sensitivity, excess carb intake can decrease insulin sensitivity and make their body behave, metabolically, more like a fat person's.

                        That stuff is all true, but taking cyanidin 3-glucoside (C3G), a nutrient-partitioning supplement, turns those rules on their carb-crunchy heads.

                        The supplement, a compound found in various berries, profoundly increases the insulin sensitivity of muscle cells while decreasing the insulin sensitivity of fat cells.

                        That means the glucose uptake in muscle cells increases, and glucose, nutrients, and BCAA's are partitioned into these same muscle cells while fat storage in general is hindered and fatty acid oxidation is increased.

                        Related:  The Insulin Advantage

                        With C3G, you're actually better off eating more carbs, particularly during the workout period, but also during other times of the day. The C3G makes your body react more like the gifted nutrient partitioner's. The calories you eat get partitioned preferentially into muscle and thus your weight gain comes from muscle and not fat.
                        If you diet while on C3G, or even if you don't, fat is burned preferentially while muscle is retained. By virtue of a chemical tweak, courtesy of C3G, your body suddenly starts to react like that of a genetically-gifted nutrient partitioner.
                        And pardon me if I don't cite a bunch of studies. You can do that by yourself. Just type "cyanidin 3-glucoside" into Google Scholar.

                        The Fatty Acid Fix


                        Another way to improve how you partition nutrients is to mind your fatty acid ratios. As you've probably read, the typical Western diet is heavy on omega-6 fatty acids and light on omega-3 fatty acids.

                        It's been reported that Americans have an omega-6 to omega-3 ratio of 20 to 1, when it should be closer to 4 to 1.
                        This huge imbalance leads to a chronic inflammatory state, and chronic inflammation is a common denominator for poor insulin sensitivity, not to mention diabetes and obesity in general.

                        As such, you gotta' eat more fish, or at least take more fish oil to balance out the ratio.

                        Two Roads to Take

                        You've got two choices if you want to improve the way you partition nutrients:

                        1. Restrict

                        You can be careful about carb intake, restricting the bulk of it to around the workout period (eating roughly 70% of your carbs before, during, and immediately after your workout) and eating most of the rest of your carbs in a post-workout meal.

                        That will help take advantage of whatever nutrient partitioning powers you might have, however meager.
                        You can also limit your total carb intake, but this is largely a two-steps forward, one-step back approach. You eat fewer carbs to sensitize your nutrient partitioning system, but provide fewer carbs to the muscle cells. So there's nothing for that enhanced nutrient partitioning ability to take advantage of!

                        2. Supplement

                        Or you can use C3G (sold as Indigo-3G) to fix or augment your nutrient partitioning powers so that you can actually eat more carbs – workout nutrition and otherwise – and ensure that the bulk of it is going to muscle instead of fat storage.
                        Similarly, you can supplement your intake of omega-3 fatty acids to stomp chronic fat cell inflammation, which will also improve insulin sensitivity.

                        Choice number 2 will give much more impressive results than just following choice number 1, but what matters is that you at least follow one of them... that is, if you want to gain muscle like the gifted.

                        Skeggǫld, Skálmǫld, Skildir ro Klofnir.

                        Comment


                        • #72
                          Het artikel hierboven komt op mij over als verkapte reclame voor een supplement.

                          Als het ware komt het hele artikel neer op:
                          1. Calorie partitioning is de sleutel tot een droog en gespierd lichaam.
                          2. Dit kan via de moeilijke weg (voeding optimaliseren) OF
                          3. Je neemt pilletjes welke je calorie partitioning verbeteren. En daar ligt ook de voorkeur van de schrijver: 'will give more impressive results'.

                          Punt twee (voeding optimaliseren, waar het uiteindelijke echt op neerkomt) wordt inhoudelijk niet diep op ingegaan. Maarja dat is waarschijnlijk ook niet het doel van dit artikel.
                          Last edited by dynobet; 24-03-2015, 09:41.
                          More knowledge will just increase your potential. For this potential to be manifested, the knowledge must be applied!

                          Comment


                          • #73
                            Originally posted by dynobet View Post
                            Het artikel hierboven komt op mij over als verkapte reclame voor een supplement.
                            Als je het er niet mee eens bent dan verwijder je hem weer. Niet zo moeilijk.
                            Skeggǫld, Skálmǫld, Skildir ro Klofnir.

                            Comment


                            • #74
                              Originally posted by Aldo Raine View Post
                              Als je het er niet mee eens bent dan verwijder je hem weer. Niet zo moeilijk.
                              Het is niet mijn manier van werken om iets te verwijderen wanneer ik het er niet mee eens ben. Ik ben wel kritisch ten opzichte van geposte artikelen en geef gewoon een aanzet tot discussie.
                              More knowledge will just increase your potential. For this potential to be manifested, the knowledge must be applied!

                              Comment


                              • #75
                                How to Create a Bodybuilding Diet

                                Ok, so you want to get huge?! You get into the gym, pound weights till you have a big red head, go home and that’s it, you maybe think that all you have to do. Pump the weights. If only it was that simple.
                                Nutrition plays a very large part of recovery and growth. Without both you won’t put muscle on. Bodybuilding diets are constantly changing due to the increase of your muscle mass; if you put muscle on you have to eat more, if you lose muscle you need to eat less. So how do you keep an eye on what is happening inside the body?
                                Well, you have two means that would work. The first is the good old scales that sit gathering dust in the bathroom; you should monitor your weight to see if your goal to put muscle on is causing an increase in bodyweight. If the scales show that weight are staying the same or going down then its time to look at the diet and eat more. If the weight is going up then is it muscle? or is the stomach getting bigger? If it’s the stomach getting bigger then you are eating too much. But be cautious, you can expect to put some bodyfat on when trying to put muscle on, but you want to monitor that the dreaded fat isn’t going on to much.
                                Another good method of checking which is going up, muscle or fat is to use a set of body fat calipers. By using the calipers every two weeks that will show exactly what is happening, if muscle is going down due to not eating enough then that will show with the calipers and you will need to eat more. If the calipers show that bodyfat percentage is going up then you need to eat less. All good gyms will have a set of calipers and as long as the same person does the measurements every time you should be able to get a true reading as to what exactly is happening. Once you have obtained the amount of total millimeters and your bodyweight, the chart that comes with the calipers will show what bodyfat percentage you are. Now comes the clever bit. If you take your bodyweight in pounds and times it by the bodyfat percentage then that will come out with your total bodyfat. Then take this figure from the total bodyweight and that will give you a figure for your fat free mass. The figure is not all muscle but includes internal organs, bones etc. but just use the figure as muscle for our calculations.
                                The two figures you have just worked out, the total bodyfat and fat free mass, should be written down and kept. Then next time you have the measurements done you will see if the bodyfat percentage has gone up. But more importantly has the total fat stayed the same or gone down?. Has the fat free mass gone up? Which is what we want, or gone down, which we don’t want. You will find that if your food intake is right then with your exercise and nutrition the fat free mass will go up and the total bodyfat will go down. But if your not eating enough then you will find that the fat free mass (muscle) is going down and the bodyfat will go up - not what you want!

                                Bodyfat Calculations

                                Example of calculations of bodyfat, and fat free mass, using the weight as 200lb, and a bodyfat percentage of 21%.
                                Bodyfat Calculations Example
                                Bodyweight: 200lbs
                                Bodyfat Percentage: 21%
                                The calculations...
                                Step1. Bodyweight x bodyfat percentage = lb bodyfat.
                                (200 x 0.21 = 42 lb bodyfat)
                                Step2. Bodyweight – 42 = fat free mass (200 – 42 = 158) (This figure is the total amount of fat free mass).
                                So now we know...
                                Bodyweight: 200lbs
                                Bodyfat Percentage: 21%
                                Total Bodyfat: 42lbs
                                Fat Free Mass: 158lbs

                                The next time you have the bodyfat percentage done ideally, you want to see that the fat free mass has gone up and the total bodyfat has stayed the same or has gone down. That is the ideal situation. But sometimes it doesn’t happen and the fat has gone up and the fat free mass has gone down. The reason that the fat free mass goes down is that possibly you are losing muscle which you are not eating enough food for the amount of work/training you are doing.
                                Ok, I hear you saying, what if I train at home? Well in this situation we can use the old favorites, a set of scales and the mirror. You know, the one you use to admire yourself in!
                                The bathroom scales should show an increase in your bodyweight, if it's not going up then your not eating enough. If the mirror is showing an increase of bodyfat around the middle then you are eating too much.
                                So how do we set about setting a nutrition plan for ourselves? Firstly we need to know how many calories we should eat in a day, on top of the calories required for our body at rest we need to add into the diet calories we expend on daily activities and our training.
                                Use This Calculator to work out your calories per day. As a basic starting point, we use a ratio of protein, carbohydrates, and fats (PCF) of 30% protein, 50% carbohydrates and 20% fats. Remember that protein and carbohydrates contain 4 calories per gram, fat contain 9 calories per gram.

                                An example: The calculator has given us a value of 2900 calories per day, so use the following calculation to find the PCF ratio:

                                • Protein: 30% of 2900 = 870 calories / 4 = 217.5g per day.
                                • Carbohydrates: 50% of 2900 = 1450 calories / 4 calories = 362.5g per day.
                                • Fat: 20% of 2900 = 580 calories / 9 = 64.4g per day.


                                So now you know exactly how much food you require per day. Now you will need to find out how much food you require (approx) per meal. You should be using frequent feedings and as such should divide the grams of food given above into as many meals per day as you can fit in, usually between 5-8 meals per day.


                                So to work the above amount of grams of food per day you use the following calculation:

                                • Total meals required per day 6. (Figures rounded off)
                                • Protein: 217.5g / 6 = 36g of protein per meal x 6
                                • Carbohydrates: 362.5g / 6 = 60g of carbohydrates per meal x 6
                                • Fat: 64.4g / 5* = 13g of fat per meal x 5*


                                * Note: In the after training meal you want the nutrients to be digested quickly and fat delays the digestion of the meal, so fat is omitted in this meal only.

                                Below are listings of the best foods for our nutrition plan, and for our recovery and growth from training. The amounts have been put as per ounce (28g) of each food for easier calculation.
                                So to work out a meal you have to look at the lists given below and choose what foods you want to use in a particular meal to give you the amounts required per meal.

                                Example: Evening meal.

                                (Requirements, protein 36g, Carbohydrates 60g, Fat 13g)
                                Food Protein(g) Carbohydrates(g) Fat(g)
                                Beef (sirloin grilled) 3oz 27.9 0.0 8.4
                                Brown rice (cooked)6oz 4.2 38.4 1.2
                                Carrot (2 large) 2.0 14 1.2
                                Cabbage (2oz) 0.8 3.2 0.0
                                Green beans (2oz) 1.0 4.0 0.0
                                Totals: 35.6 60 10.8

                                So you can see by the above meal that you are very close to the total amount that is required per meal, you can have larger meals for the main meals like breakfast, lunch and evening meal, and smaller meals for mid morning, mid afternoon, and supper time.
                                Use the charts below to calculate your meals for your given calculations, you will find that after you have done it a couple of times how easy it is, and you will also get to know what the portion size you require for that given amount of food.

                                Once you have your food sorted out, give the plan two weeks for the body to adapt to your new eating plan. Then if...
                                1. You're not gaining weight. Eat twice the amount of carbs and 1.5 times as much protein at two of your meals per day.
                                2. You're gaining weight, but its as much fat as it is muscle. Eliminate carbs at your last two meals of the day, (excluding your post workout meal.
                                3. You're gaining weight and losing bodyfat. Follow the directions in rule (1) above at every meal.
                                4. You did fine at first, but now your bodyfat has increased. Halve your carbs at your last two meals. If the bodyfat falls in two weeks, increase your carbs.


                                Best Foods For Muscle Building

                                Below is a list of the best bodybuilding foods and their macronutrient profiles, with the information below you can build a diet based on your own particular goals, mass building, getting lean, or just basic maintenance of your diet.

                                Meat, Fish, Poultry. (per ounce, 28g)
                                Food Calories Protein(g) Carbohydrates(g) Fat(g)
                                Atlantic Salmon 56.6 7.7 nil 2.4
                                Bacon back (grilled) 27.0 3.4 nil 1.2
                                Beef (mince-lean) 53.0 8.0 nil 2.1
                                Beef (silverside) 54.4 8.7 nil 1.8
                                Beef (sirloin-grilled) 64.0 9.3 nil 2.8
                                Beef (topside) 54.7 9.9 nil 1.5
                                Catfish (fillet) 46.6 8.0 nil 1.2
                                Chicken (breast) 49.7 9.6 nil 1.2
                                Chicken (drumstick) 23.6 3.7 nil 0.9
                                Chicken (thigh) 33.6 4.3 nil 4.3
                                Cod 32.6 7.1 nil 0.3
                                Crab (Alaskan) 30.1 5.9 nil 0.6
                                Deli roast beef 15.5 2.5 0.6 0.3
                                Halibut 43.5 8.4 nil 0.9
                                Ham (sliced-lean) 40.7 6.2 0.3 1.5
                                Lamb (leg) 63.7 8.2 nil 3.7
                                Pork tenderloin 51.0 8.7 nil 1.5
                                Scallops 27.3 5.2 0.9 0.3
                                Shrimps 30.8 6.5 nil nil
                                Tuna (bluefish-fresh) 57.2 9.3 nil 1.8
                                Tuna (canned-white) 39.8 8.0 nil 0.9
                                Turkey (breast) 42.9 9.3 nil nil
                                Venison (tenderloin) 46.3 9.3 nil 0.6

                                Dairy & Egg Products. (per ounce, 28g)
                                Food Calories Protein(g) Carbohydrates(g) Fat(g)
                                Egg (whole-1 large) 74 6.0 trace 5.0
                                Egg (substitute-50ml) 53 8.0 trace 2.0
                                Egg (white-1 large) 18.0 4.0 trace trace
                                Low fat buttermilk (250ml) 98.0 8.0 12 2.0
                                Ricotta cheese (part skimmed) 38.3 3.13 1.3 2.24
                                Yogurt (plain fat-free) 15.8 1.6 2.1 trace
                                Cheddar Cheese (reduced fat) 54.8 7.8 1.1 2.2
                                Swiss Cheese (reduced fat) 56.0 8.9 1.1 1.1
                                Skimmed Milk(250ml) 86 8.0 12 trace
                                Cottage Cheese (2%) 25.0 4.0 1.0 1

                                Nuts Seeds and Oils. (per ounce, 28g)
                                Food Calories Protein(g) Carbohydrates(g) Fat(g)
                                Almonds 183 6.7 6.7 15.6
                                Almond Butter (1 tbsp) 101 2.5 3.5 9.5
                                Canola oil (1 tbsp) 124 0.0 0.0 14
                                Flaxseeds (1 tbsp) 59 2.3 4.0 4.0
                                Olive Oil (1 tbsp) 119 0.0 0.0 14
                                Peanut butter 96 4.0 3.0 8.5
                                Peanuts (dry roasted) 186 7.8 6.7 15.6
                                Walnuts 207 4.5 4.5 21.2

                                Grains, Breads, and Pasta. (per ounce, 28g)
                                Food Calories Protein(g) Carbohydrates(g) Fat(g)
                                Bagel, plain (1 small-3”) 190 7 37 1
                                Barley, pearl (cooked) 33.7 7 7.7 0.1
                                Bran Muffin (1 small) 178 5 32 5
                                Brown Rice (cooked) 31.1 0.7 6.4 0.2
                                Corn, tortilla (1) 58 2 12 1
                                Couscous (cooked) 30.8 1 6.4 trace
                                Crumpet (1) 134 4 26 1
                                Flour, tortilla (8”dia) 146 4 25 3
                                Macaroni (wholewheat) 39.3 1.4 8 0.2
                                Oatmeal (cooked) 17.2 0.7 3.0 0.2
                                Rye bread (1 slice) 83 3.0 16 1.0
                                Sourdough Bread (1 slice) 88 3.0 17 1.0
                                Spaghetti (wholewheat) (cooked) 39.3 1.4 8.0 0.2
                                Wheatgerm (1tbsp) 26 2.0 4.0 0.5
                                White rice (cooked) 31 0.6 6.8 trace
                                Wholegrain Cereal 84 2.0 21.4 0.9
                                Wholegrain Crackers (5) 90 2.0 14 3.0
                                Wholemeal Bread (1 slice) 73 3.0 13 1
                                Wholemeal Pitta (1) 170 6.0 35 2.0
                                Wholemeal Pretzels 115 3.3 21.4 0.9
                                Wild Rice (cooked) 28.1 1.1 5.9 0.1

                                Fruits (per ounce, 28g)
                                Food Calories Protein(g) Carbohydrates(g) Fat(g)
                                Apple 1 (med) 72 trace 19 trace
                                Apricots (3) 50 2.0 12 trace
                                Avocado (1/4) 80 1.0 4.0 7.0
                                Banana (1 med) 105 1.0 30 trace
                                Blueberries 50.6 0.1 3.9 trace
                                Cantaloupe 9.4 0.1 2.2 trace
                                Cherries (tart) 14 0.3 3.4 trace
                                Grapefruit (1/2 Medium) 41 1.0 10 trace
                                Grape Juice (100 ml) 45.2 trace 19 trace
                                Grapes (seedless) 20 0.1 5.4 trace
                                Melon (cubed) Honeydew 10 0.1 5.4 trace
                                Mango (cubes) 18 0.1 4.7 trace
                                Nectarine (1 medium) 60 1.0 14 trace
                                Orange (1 navel) 69 1.0 18 trace
                                Orange Juice (100ml) 44.8 0.8 26 trace
                                Papaya (cubes) 10.9 0.1 2.8 trace
                                Peach (1 med) 38 1.0 9.0 trace
                                Pear (1 med) 96 1.0 26 trace
                                Pineapple (cubes) 13.3 1.0 20 trace
                                Plum (1) 30 Trace 8.0 trace
                                Raisins (loose) 86.3 0.7 23 trace
                                Raspberries 14.3 0.4 3.3 0.1
                                Strawberries 9.1 0.1 2.2 trace
                                Watermelon (cubes) 8.5 0.1 2.2 trace

                                Legumes (per ounce, 28g)
                                Food Calories Protein(g) Carbohydrates(g) Fat(g)
                                Lima Beans (baby) 33.8 2.0 6.1 trace
                                Black Beans 36.8 2.3 6.5 trace
                                Chickpeas 46.9 2.4 8.0 0.7
                                Kidney beans 34 2.4 8.0 trace
                                Lentils (cooked) 32 2.5 5.6 trace
                                Tofu (raw) 45 4.9 1.1 2.5
                                Soya beans (cooked) 79 6.8 6.2 3.1
                                Split Peas (cooked) 32.4 2.2 5.8 trace

                                Vegetables (per ounce. 28g)
                                Food Calories Protein(g) Carbohydrates(g) Fat(g)
                                Artichokes (1 medium) 60 4.0 13 trace
                                Asparagus (4 large spears) 16 2.0 3.0 trace
                                Aubergine (cubed) 7.0 trace 1.4 trace
                                Beats (sliced cooked) 2.35 0.8 2.8 trace
                                Broccoli (florets raw) 7.7 0.6 1.2 trace
                                Brussels sprouts 10 1.2 2.0 trace
                                Butternut squash 11.5 0.3 3.0 trace
                                Cabbage (shredded) 6.8 0.4 1.6 trace
                                Carrot (1 large) 30 1.0 7 trace
                                Cauliflower 7.0 0.5 2.0 trace
                                Chinese cabbage (cooked) 3.3 0.5 .05 trace
                                Collard greens (chopped) 1.6 0.1 0.3 trace
                                Corn, kernels 22 1.0. 5.0 0.3
                                Courgette (chopped) 5.0 0.4 0.9 trace
                                Cucumber (sliced) 4.3 0.2 1.0 trace
                                Garlic (1 clove) 5.0 trace 1.0 trace
                                Green beans 3.7 0.5 2.0 trace
                                Green peas (raw) 24 1.6 4.3 trace
                                Kale (chopped) 6.5 0.6 1.5 0.2
                                Mushrooms (sliced) 6.0 0.8 0.8 trace
                                Onion (chopped) 11.5 0.3 2.8 trace
                                Pepper (green) Chopped 5.6 0.2 1.3 trace
                                Potato (1 med) Baked 161 4.0 37 trace
                                Potato (boiled) 24 0.0 6.0 0.0
                                Potato (mashed with milk) 23 1.0 5.0 0.0
                                Pumpkin (fresh) 5.6 0.2 1.2 trace
                                Romaine lettuce (shredded) 6.2 0.6 1.2 trace
                                Spinach 7.0 1.0 1.0 trace
                                Sweet potato 1 med, baked) 103 2.0 24 trace
                                Tomato (1 lge) 33 2.0 7.0 trace
                                Tomato juice (100ml) 16 0.8 4.0 trace

                                In Summary...

                                Remember that if...
                                1. You're not gaining weight.
                                  Eat twice the amount of carbs and 1.5 times as much protein at two of your meals per day.
                                2. You're gaining weight, but its as much fat as it is muscle.
                                  Eliminate carbs at your last two meals of the day, (excluding your post workout meal.
                                3. You're gaining weight and losing bodyfat.
                                  Follow the directions in rule (1) above at every meal.
                                4. You did fine at first, but now your bodyfat has increased.
                                  Halve your carbs at your last two meals. If the bodyfat falls in two weeks, increase your carbs.
                                Skeggǫld, Skálmǫld, Skildir ro Klofnir.

                                Comment

                                Sidebar top desktop

                                Collapse

                                Actieve discussies

                                Collapse

                                porn porn porn porn porn porn porn porn porn porn porn porn porn porn porn porn porn
                                erotik film izle Rus escort gaziantep rus escort
                                Antalya Escort
                                sikis
                                gaziantep escort
                                gaziantep escort
                                İstanbul Escort
                                istanbul escort bayan
                                sisli escort beylikduzu escort bayan
                                antalya escort atakoy escort
                                umraniye escort bayan
                                Very sweethearts get banged by pretty pals Баба посидела анусом на крепком стояке fotos de vaginas sexis
                                Working...
                                X